Parsing PNGs with Node, Part 1
This blog post is the first in a series about image manipulation and parsing. This project started because I was curious how I might go about manually resizing an image. I’m also experimenting with manual image generation as a part of this project.
If you’d like to follow along as we go, the repo for the project is here. The PNG spec is here.
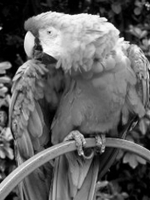
Here is the image I used:
libpng also has a comprehensive suite of images to use in tests.
Let’s jump in.
The question: What do the internals of an image actually look like?
It started with curiosity around this question: “What actually is an image? What does it look like under the hood?” Obviously different image formats will look different interally, so I had to pick one to start with, and I chose PNGs. Why PNGs? I didn’t have any particular reasoning behind selecting PNGs as my test case. Since I work on a Mac, I thought being able to generate my own PNG samples via screenshots might make this easier. That turned out not to be the case, but more on that later.
I knew there was only one to find out – crack open the file and look inside.
PNG Internals
While there are many different chunk types defined for a PNG, only three are absolutely required for a valid PNG. The IHDR chunk, at least one IDAT chunk (although there could be multiple, depending on the size of the image), and lastly the IEND chunk.
Because the goal of my project was not to write a brand new PNG viewer (although, that could happen in a future post!), I focused only on the absolutely necessary parts. As such, this post will not cover chunk types outside of IHDR, IDAT, and IEND.
Note: If you’d like to learn more, all chunk types are covered in the spec.
IHDR Values and Structure
PNGs are made up of multiple different “chunks”. In order to be a valid PNG, the first chunk must be the IHDR chunk. The Image Header chunk (IHDR) contains, you guessed it, information about the image. It is always 13 bytes and contains the following information, which will always be in this order:
- Width (in pixels)
- Height (in pixels)
- Bit depth
- Color type
- Compression method
- Filter method
- Interlace method
I’ll explain more about these in the next post. For now, just know that since the image is a flat array of bytes, we need all of this information to derive information such as: where a row of pixels starts and stops, how many bits or bytes make up a single pixel, how many color channels are used, and more. For now, we’ll focus on parsing out this information.
Parsing the IHDR
Here is an example from my project to parse the IHDR chunk.
First, we need to handle for the PNG signature. The signature is always 8 bytes (bytes, not bits), and contains the same decimal values. These values indicate the file type is a PNG. Since we know we’re parsing a PNG, we’ll just skip the signature.
Our method will take the buffer response from reading the file as it’s parameter.
function parsePng(data) {
  // the variables we are looking for from the IHDR chunk
  let width;
  let height;
  let bitDepth;
  let colorType;
  let compression;
  let filter;
  let interlace;

  // first handle for the signature
  let i = 8;
}
So far, it’s pretty straightforward. The data parameter is a buffer (an array of bytes). After we instantiate the variables we plan to parse out of IHDR, we create our offset, which skips the first 8 bytes. Next we would start looping over the buffer, but before we get too far into that, let’s talk about chunk structure.
In the first section, I mentioned that the PNG buffer is a flat array of bytes - that means there are no delimiters to signal the end of a line or the beginning of the next line. There’s also no delimiter between chunks. In fact, there are no spaces or empty bytes at all between any of the sections of a PNG. However, it’s possible to derive when you’re at the end of a chunk, based on the structure.
A chunk is made up of four parts:
- Length - the first 4 bytes of a chunk indicate the length of the data section. It’s important to note that this length is not the length of the current chunk. It is only representative of the data within the chunk.
- Type - the next 4 bytes tell you the type (name) of the current chunk
- Data - this is the part we are really after! This is the only part of a chunk with a dynamic length. All other sections are 4 bytes long.
- CRC - the final 4 bytes of a chunk. It’s essentially a checksum to validate your offsets
Every single chunk type will follow this structure and order, including IHDR and IDAT chunks.
Now that we know a little more about what we’re looking at, let’s continue:
function parsePng(data) {
  let width;
  let height;
  let bitDepth;
  let colorType;
  let compression;
  let filter;
  let interlace;

  // first handle for the signature
  let i = 8;

  // loop over the data
+  while (i < data.length) {
    // find the length of the current chunk
+    let chunkDataLength = data.readUInt32BE(i);

    // update the offset
+    i = i + chunkLength + 12;
+  }
}
We’ve added the loop and the first building blocks we need. In the loop, we first find the length of the data section, and then we use that to update the loop’s offset. We take the current position in the buffer, and add the data length (because this is the part of a chunk whose length is dynamic) + 12 bytes, to cover the rest of the chunk. Remember, there are no spaces or empty bytes between chunks, so this offset will take us to the very first byte of the following chunk.
Now we’re ready to parse the IHDR chunk:
function parsePng(data) {
  let width;
  let height;
  let bitDepth;
  let colorType;
  let compression;
  let filter;
  let interlace;

  // first handle for the signature
  let i = 8;

  // loop over the data
  while (i < data.length) {
    // find the length of the current chunk
    let chunkLength = data.readUInt32BE(i);

    // find the type of the current chunk
+   let chunkName = data.toString("ascii", i + 4, i + 8);

    // access IHDR
+   if (chunkName == "IHDR") {
      // create an offset to set the position at the beginning of the data section
+     let ihdr = i + 8;

      // parse the header data
+     width = data.readUInt32BE(ihdr);
+     height = data.readUInt32BE(ihdr + 4);
+     bitDepth = data[ihdr + 8];
+     colorType = data[ihdr + 9];
+     compression = data[ihdr + 10];
+     filter = data[ihdr + 11];
+     interlace = data[ihdr + 12];
+   }

    // update the offset
    i = i + chunkLength + 12;
  }

  // return the header data
+ return {
+   width,
+   height,
+   bitDepth,
+   colorType,
+   compression,
+   filter,
+   interlace,
+ };
}
You might notice a difference between the way we treat the first value within a chunk (length) and the next value (type). The length is always 32-bit integer, whereas the chunk type is always 4 ASCII characters. Because these are different data types, we must access their values differently.
The next bit of code is very straightforward. We identify the IHDR chunk and set the header values. Notice again that the first two values are treated differently than the next five. Because those first two initial values are 32-bit integers, we need to parse all four bytes together to find the correct value for each.
The final five values are all single byte values, so they can be directly accessed.
The image header for the test image I used looked like this:
{
  "width": 150,
  "height": 200,
  "bitDepth": 8,
  "colorType": 0,
  "compression": 0,
  "filter": 0,
  "interlace": 0
}
Now that we have the image header information, we’re ready to get into the actual pixel values of the PNG! I’ll cover that in the next blog post.

