Push It Real Good (to GitHub)
Do you guys remember that Geico commercial with Salt-N-Pepa singing ‘Push It Real Good’? I think about that commercial every time I push to GitHub.

Ok, but really. In all seriousness, I used to have a ton of trouble pushing to GitHub. In my last post, I talked about creating a GitHub repository. In this post, I’m going to explain how to push to it after you’ve created it.
When I was first getting started on GitHub, I seemed to follow this inevitable pattern. First, I would make a repository and push the files I had locally to that repository. Then I would change some stuff around locally, like move the files to a new folder, or something like that and I wouldn’t be able to push to GitHub anymore. I’d delete the repository, (lose all the commits I’d been tracking in the process) and it was an all-around bad deal.

But practice makes perfect, and with much practice, I was finally able to figure out what the hell was up with GitHub. I’m really happy I did, because GitHub is actually pretty cool.

So, I’ll assume at this point that you already have a GitHub repository you’re pushing your work to. If not, check out my first post. Many times when I’ve been discussing GitHub with friends, I’ve been asked whether or not a person should wait until their project is completed and then post it to GitHub. The answer to this is a resounding No.
GitHub has a great function of tracking your changes, and holding on to your history for you. If you aren’t uploading your code as you create it, it cannot track it for you. In addition, it is a great way to back up your code (though you should be doing this with USB drives, as well) and it allows you to share your code with others if and when you get stuck on something.
So, moral of the story is, push your code to GitHub as soon as you have some code to push.
Let’s get started on how you can do this. All directions are for pushing code from the terminal, as is my preference. First open your terminal and go ahead and CD into the directory containing your work.
git status
This command will check the status of your GitHub repository against the status of your local work. If there are differences, such as new files, deleted files, or changes within a file, it will list this out for you in your terminal.
git diff
This command will show you the differences between the file in your GitHub repo, and the file you have locally.
git add . OR git add --all OR git add “filename”
The first two variations will add all of the changes (including any deletions) you have made. The third command will allow you to only add changes from a specific file. This can be useful if your settings change between your local machine and GitHub. You’ll be able to add only the changes to the code, and keep your settings the same.
git commit -m “message”
This actually commits the files you have added.
git push origin <branchname>
This will push all of your local changes to GitHub, and then ta-da! You’re all done.
Questions? Tweet me!
Git started on GitHub
If you follow my blog at all, you probably know that I really, really like GitHub. Have you looked at GitHub and wondered, “Why? What’s the big deal, Carmen?”
That’s ok! When I first discovered GitHub, I really didn’t get the appeal either.
<flashback to past-me>I mean, it’s cool, I guess. It’s a place to put code, and all the coders I talk to say I should have one, so I guess I’ll get one.
*makes account. does nothing with it for 6 months.*</flashback>
But present-me loves GitHub.
GitHub is a place to show off your code. And as a beginner, or even a non-beginner, it’s totally fine to use it in this sense. I also use it as a sort of ‘staging server’ before I push my stuff to my live website. This allows me to see how things render before actually pushing them live. Also completely fine. But the possibilities of GitHub span far beyond this.
Let’s pretend you want to work with a group of coders on your ‘cool project A.’ And let’s also say that because you are an incredibly efficient bunch, you’ve divided up the work amongst yourselves. How can you make sure that your work isn’t overlapping, and keep track of the changes, and, you know, actually do the work?
Well! GitHub is going to help you with two of those things. (Spoiler: GitHub will not do your work for you. I’ve tried.)
Being the industrious group that you are, you hop on GitHub and make yourselves a repository (or repo). You and your friends each fork that repo on to their own GitHub pages, and then create branches based on the work each of you are assigned.
You commit work on to your own branch, and since everyone has their own branch, none of the work deletes the other work being done. GitHub will keep track of when the commits were made, and who made them. It will also keep your old commits for you, so you can see the progression of the work. Pretty sweet, right?
Then once you’ve completed your work and can do a pull request into the main repo and voila! And if it turns out that some of the teammates got their wires crossed and they have code that contradicts each other, GitHub will let you know, and show you where this code is. This is especially helpful when you’ve been coding for so long you can’t see straight anymore, and then come back to realize you’ve completely messed up some stuff you did before. (That was personal experience there.)
So, now that I’ve convinced you that GitHub is the way to go, let’s git started! (hahaha, see what I did there??)
Keep in mind, I am giving instructions for doing this through the command line, as is my preference. If you don’t have Git installed, you’ll need to get that installed. You find more information on that here.
GitHub does offer a GUI tool, but I have never liked it. (This tool is available for both Windows and Mac.) If you do try it out, please let me know what you think of it in the comments!
Before we get started on this, you should already have a folder with the work you are uploading somewhere on your computer.
Step 1: Create a GitHub account
This step should be pretty easy. Just go to GitHub, and make an account.
Step 2: Create a repo
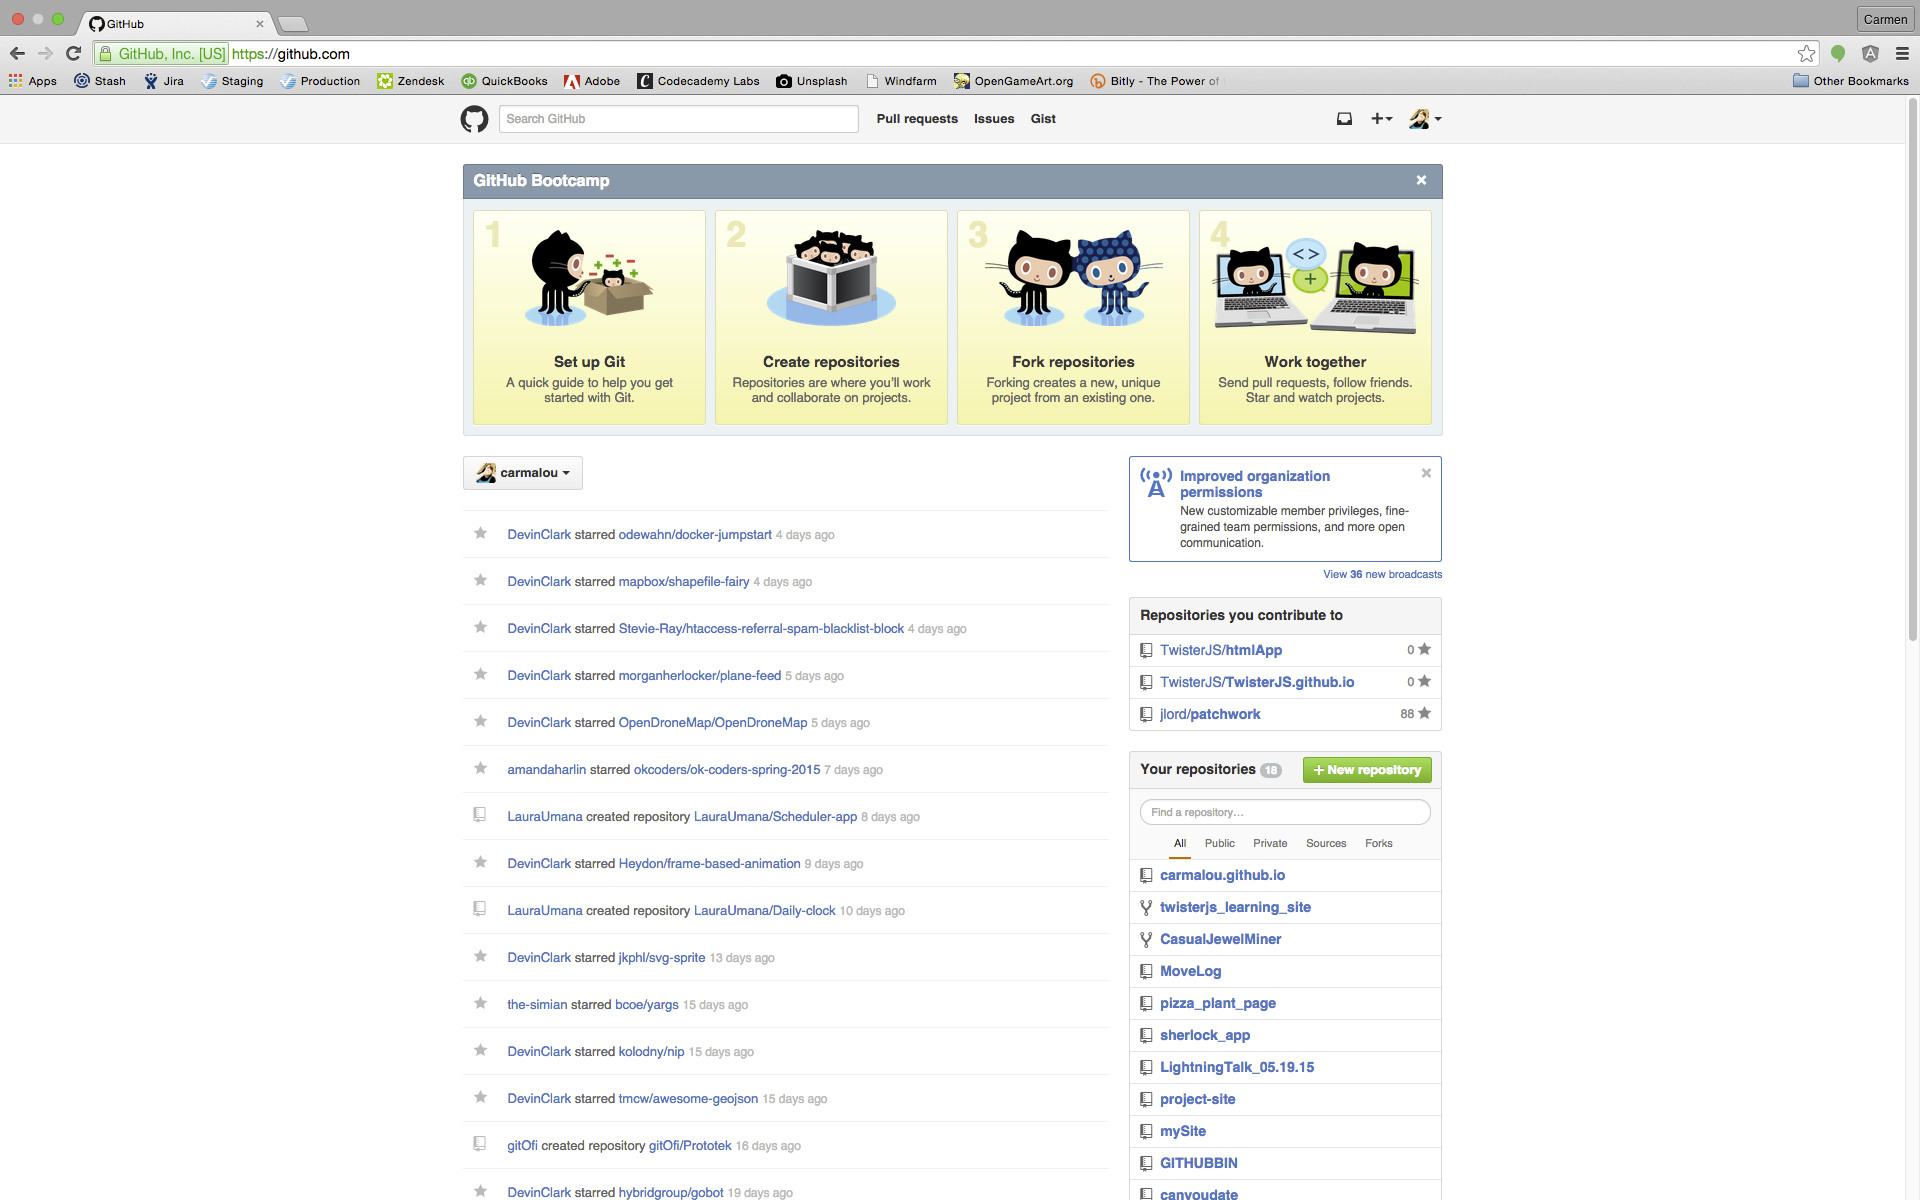
This is what your GitHub homepage looks like. Kind of like Twitter or Facebook. You’ve got the NewsFeed showing you what your coder friends have been up to. On the right side you’ll see a button with a plus sign on it, “+ New repository.” Click there and you’ll be able to make a new repository.
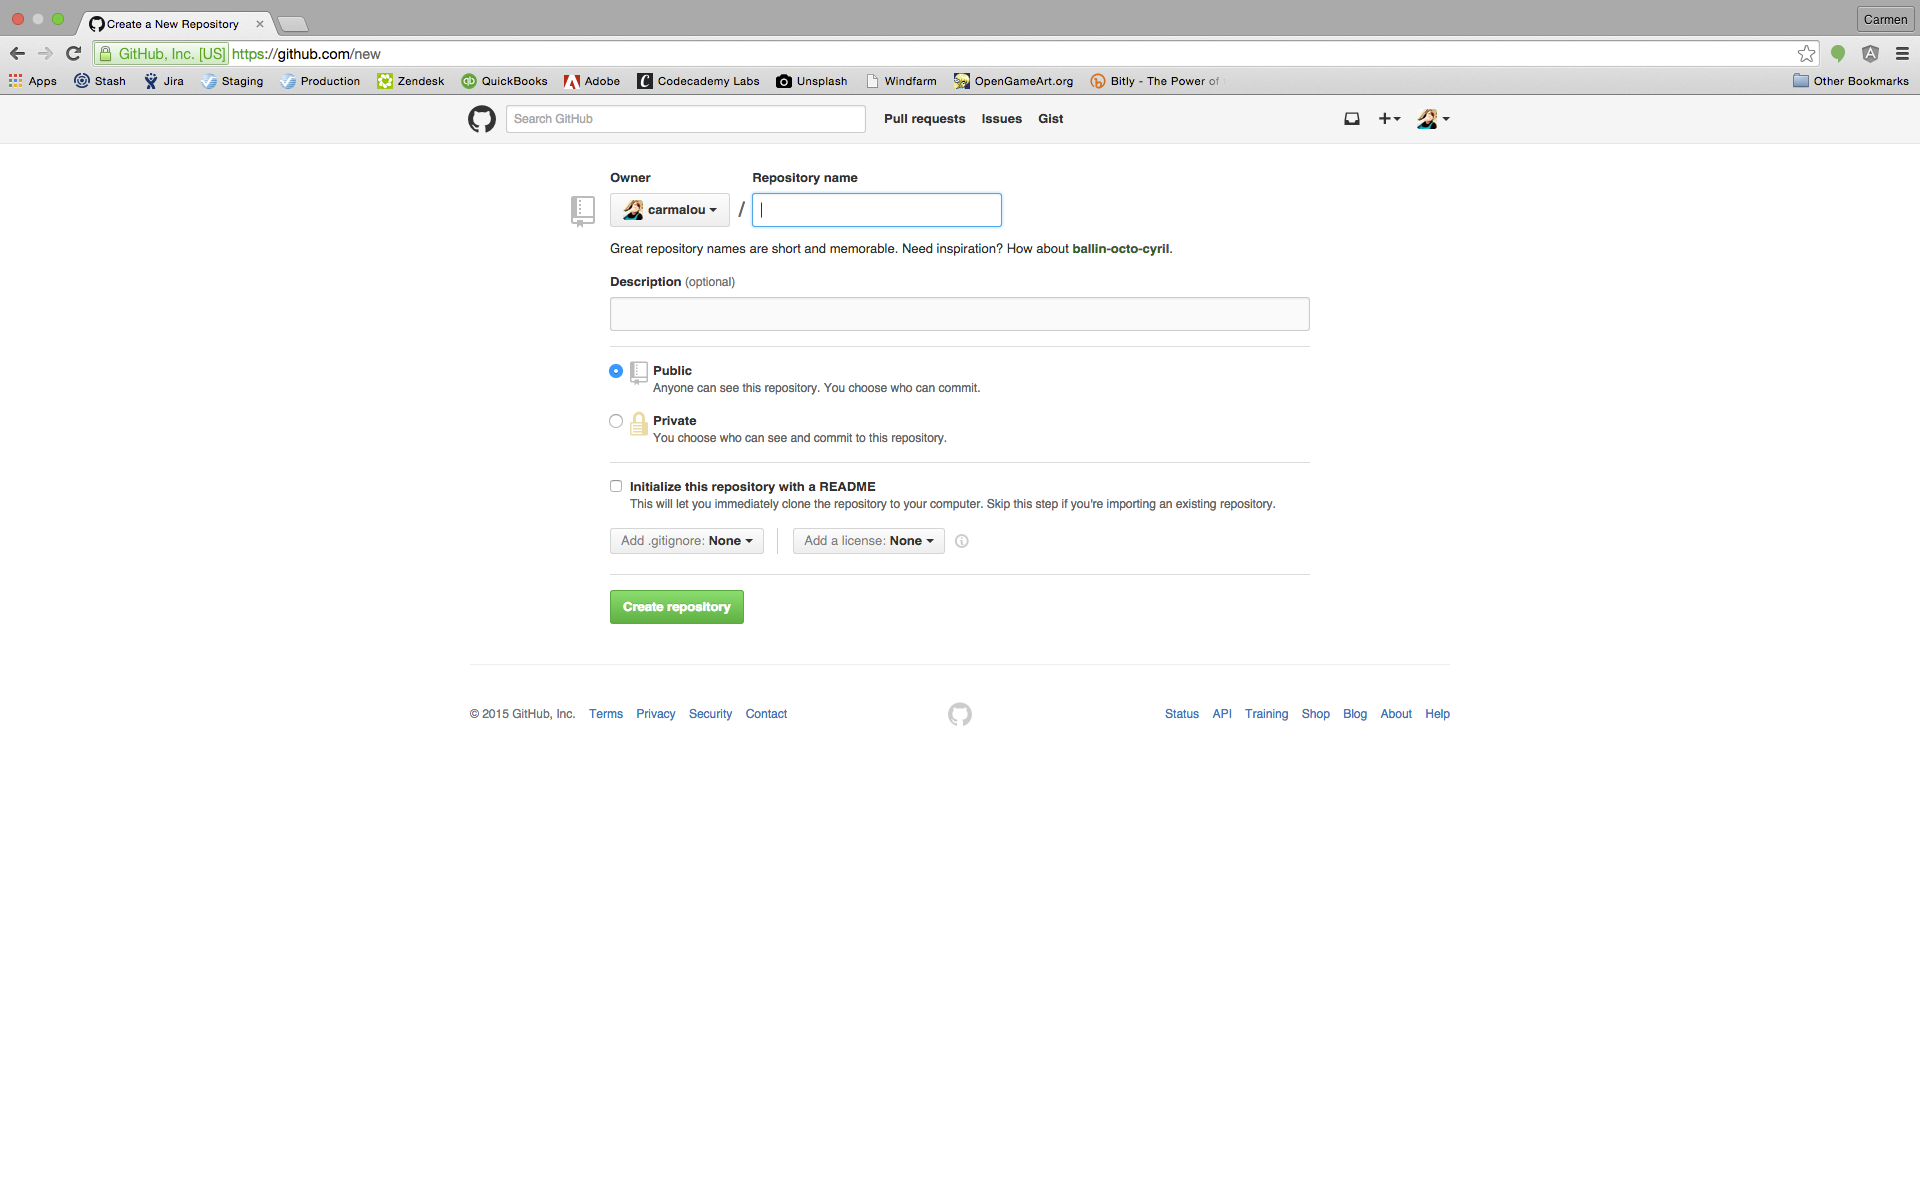 Pretty simple. Just fill in the blanks and BOOM. New repo. Look at you go!
Step 3: Man the terminal
 Ok, so this might be a little bit intimidating if you’ve never used the terminal before, but it’s not bad, I promise. And I’m whipping up a post about handy terminal commands here shortly, so you’ll be able to use that as a reference.
You can find the terminal by simply searching for ‘terminal’ in your spotlight on your Mac. I use iTerm, which you can get here. Using iTerm is fine, as is using your built-in terminal. Use your terminal to cd (change directory) into your desired directory.
Let’s take a quick look at these commands.
I usually skip the first echo command. All that does is write the name of your repository into a readme file. It’s fine to go ahead and use that command, or skip it.
git init
This command initializes the repository in your local directory.
git add
This command will add one or multiple files. If you run this command the way the picture above shows, you’ll only upload the single readme file. If you run instead ‘git add .’ (and remember that space, it’s important and no quotes) you’ll add all of the files and changes in your local directory. This does not actually upload the files. It only adds them so they can be committed.
git commit
This command is what actually commits your files. You’ll run ‘git commit -m “message here”’ (once again, spacing is important, and only place quotes around your message). Try to give a good message of what you’re actually uploading. This helps if you’re going back through old commits later trying to remember what they all were.
git remote add origin
You’ll only use this command once when you’re actually setting up your repo. This tells your local directory which URL to send those files to.
git push
You’ll run git push -u origin master to commit your first files to the master branch. Typically you’ll see master as the main branch, and all changes are pulled into master so it isn’t changed much. However, you can call your branches whatever you like.
The push commit will look like this…. ‘git push origin <BranchName>’
Step 4: Celebrate!
And that’s it! You’ve uploaded your first files into your brand new repo! If you refresh the page you’ll be able to see what your repo looks like now.
 This is just how to get started with your first repo on GitHub. Be sure to check out for my next post on pushing changes to GitHub.
I would also be remiss if I didn’t mention some of the other great resources out there for learning about GitHub. You can checkout an interactive class from Jessica Lord. The exercises are very informative and the class is fun!
Also check out CodeSchool’s Try Git class. While this class is free, I definitely recommend signing up for CodeSchool if you can afford it. There are lots of great classes on there, and they work hard everyday to add more classes for us. (Yup, I’m a student there!) Plus their jingles are pretty rad.
I hope this helps get you started, and I hope you come back for the next post in my GitHub weekend series!
Questions? Tweet me!
Weird Things I've Run Across in JavaScript, Part 2
In my last post I explained the difference between using == and ===. In this post I’m going to talk about type conversion in JavaScript.
(2 + 2) * (2 + 2);

('2' + '2') * ('2' + '2');
What do you think the answers are? It should be 16, right? Well, it should be, and the first equation does have an answer of 16. That second equation though is a little bit weird.
Look closely and you’ll see that the numbers are not actually numbers….they are in fact strings. JavaScript uses the plus sign to concatenate two strings, so what actually happens here is the strings are pushed together to result in 22.
This ends up looking like this: (‘22’) * (‘22’).
What happens next is where things start to get interesting. The ‘22’ is still in a string, but the JavaScript doesn’t really know what to do with two strings that should be multiplied.
Rather than throw an error that you can’t multiply two strings, JavaScript instead tries to help by converting the string to a number. So (‘22’) * (‘22’) ends up being 484. It’s good to note that JavaScript does not covert the number back to a string afterward.
If you would like to a take a closer look, you can check out my JSFiddle here.
Wait, wait, wait, you think. What happens if you multiply two strings that are actually letters. Like this: ‘what’ * ‘happens’ * ‘if’. (This is also in the JSFiddle, if you want to check that out.)
Well the type conversion still happens, but because you can’t actually multiply ‘what’ * ‘happens’ * ‘if’, the result it will give you is NaN, or Not a Number.
Kinda weird … but kinda cool, right?
Questions? Tweet me!
Weird Things I've Run Across in JavaScript, Part 1
This is an ongoing series about weird things I’ve run across in JavaScript. For part one, we’ll talk about === vs. ==.
Three equal signs is unique to a few languages, including JavaScript. When you have two equal signs like this:
2 == 2;
You are testing if each item is equal to the other, you can use two equal signs. The above expression would be true. But with three equal signs, it also tests the type.
2 === 2;
This would also evaluate to true, but let’s take a look at some of the weird things you can do with two equal signs as compared to three equal signs.
'2' == 2;

'2' === 2;
The first example will evaluate to true, even though the first two is in a string. This is because two equal signs does not check for type, in fact it will completely ignore the type if the contents of the string are equal to the number. This can cause some weird things to happen, and we’ll get to that in a moment.
The second example will not evaluate to true because that third equal sign does test for type. Even though the content of the string is 2, because the types are not the same, they cannot be equal.
How To JavaScript
In this post I’m going to explain how to get started writing JavaScript. First, let’s talk about why you should learn JavaScript.
A few things I really love about JavaScript … there are loads of free and easily accessible programs and websites to get you started. Another really great thing about JavaScript is that there is no installation required. Unlike other languages you need to install on your machine before you can get started, JavaScript requires only a text editor. Also you don’t need to be on any specific operating system to code in JavaScript. Mac, Windows, Linux, whatever! JavaScript loves them all.
JavaScript does have some interesting nuances that some say do not make a good language for the beginning programmer. I disagree (and I might be a little biased, since I got started on JavaScript), because I think the pros of JavaScript outweigh the weird nuances.
One more thing … Java is NOT JavaScript. Don’t let anyone tell you different.
A few things to note … most operating systems have a built-in text editor. However, I have had some issues in the past with the Mac text editor adding in characters which broke the page I was working on. You can avoid this by downloading a free text editor like Atom or Brackets.
To get started in JavaScript, you’ll need a few things:
- A computer
- An internet connections (ideally Google Chrome)
- A text editor (see above)
- PATIENCE!

Like when you learn any new language, it’s going to be hard. Don’t let this discourage you – it’s totally normal. The first thing I would recommend is getting a book to use for a reference. You won’t necessarily learn from the book (unless that is your learning style, in which case, go crazy!), but it’s good to have to look stuff up.
Here are some of my favorite books:
Go ahead and make yourself a GitHub profile so that you can show off all the fancy stuff you’re learning! And don’t worry, I have a dandy little post on GitHub coming right up.
I would say get on Codecademy and go through their JavaScript course first. Once you get through their JavaScript course, head over to Coderbyte. This is a pretty cool place with JavaScript challenges. You can post all of these to your GitHub page to show off your knowledge. If you aren’t attending local usergroups, you definitely should. Not only can you meet cool people, you can find people to help you when you get stumped. And you can meet other beginners and help them when they get stumped! It’ll be awesome!!
By this point, you are probably feeling confident enough to start working on your own project. That is great! If you aren’t feeling confident enough, I say do the project anyway! Don’t let what you don’t know limit what you think you can do. You can always learn more. You can’t get the time you didn’t spend working on your project back though. So go crazy!
I also really recommend starting a blog to document topics you’re learning. I find that this is a very useful way to solidify your understanding of a topic. Plus it can act as a giant resume for potential employers. Basically a win-win.
I hope this helps you get started, and if you find something I missed, let me know!
Questions? Tweet me!

