Git started on GitHub
If you follow my blog at all, you probably know that I really, really like GitHub. Have you looked at GitHub and wondered, “Why? What’s the big deal, Carmen?”
That’s ok! When I first discovered GitHub, I really didn’t get the appeal either.
<flashback to past-me>I mean, it’s cool, I guess. It’s a place to put code, and all the coders I talk to say I should have one, so I guess I’ll get one.
*makes account. does nothing with it for 6 months.*</flashback>
But present-me loves GitHub.
GitHub is a place to show off your code. And as a beginner, or even a non-beginner, it’s totally fine to use it in this sense. I also use it as a sort of ‘staging server’ before I push my stuff to my live website. This allows me to see how things render before actually pushing them live. Also completely fine. But the possibilities of GitHub span far beyond this.
Let’s pretend you want to work with a group of coders on your ‘cool project A.’ And let’s also say that because you are an incredibly efficient bunch, you’ve divided up the work amongst yourselves. How can you make sure that your work isn’t overlapping, and keep track of the changes, and, you know, actually do the work?
Well! GitHub is going to help you with two of those things. (Spoiler: GitHub will not do your work for you. I’ve tried.)
Being the industrious group that you are, you hop on GitHub and make yourselves a repository (or repo). You and your friends each fork that repo on to their own GitHub pages, and then create branches based on the work each of you are assigned.
You commit work on to your own branch, and since everyone has their own branch, none of the work deletes the other work being done. GitHub will keep track of when the commits were made, and who made them. It will also keep your old commits for you, so you can see the progression of the work. Pretty sweet, right?
Then once you’ve completed your work and can do a pull request into the main repo and voila! And if it turns out that some of the teammates got their wires crossed and they have code that contradicts each other, GitHub will let you know, and show you where this code is. This is especially helpful when you’ve been coding for so long you can’t see straight anymore, and then come back to realize you’ve completely messed up some stuff you did before. (That was personal experience there.)
So, now that I’ve convinced you that GitHub is the way to go, let’s git started! (hahaha, see what I did there??)
Keep in mind, I am giving instructions for doing this through the command line, as is my preference. If you don’t have Git installed, you’ll need to get that installed. You find more information on that here.
GitHub does offer a GUI tool, but I have never liked it. (This tool is available for both Windows and Mac.) If you do try it out, please let me know what you think of it in the comments!
Before we get started on this, you should already have a folder with the work you are uploading somewhere on your computer.
Step 1: Create a GitHub account
This step should be pretty easy. Just go to GitHub, and make an account.
Step 2: Create a repo
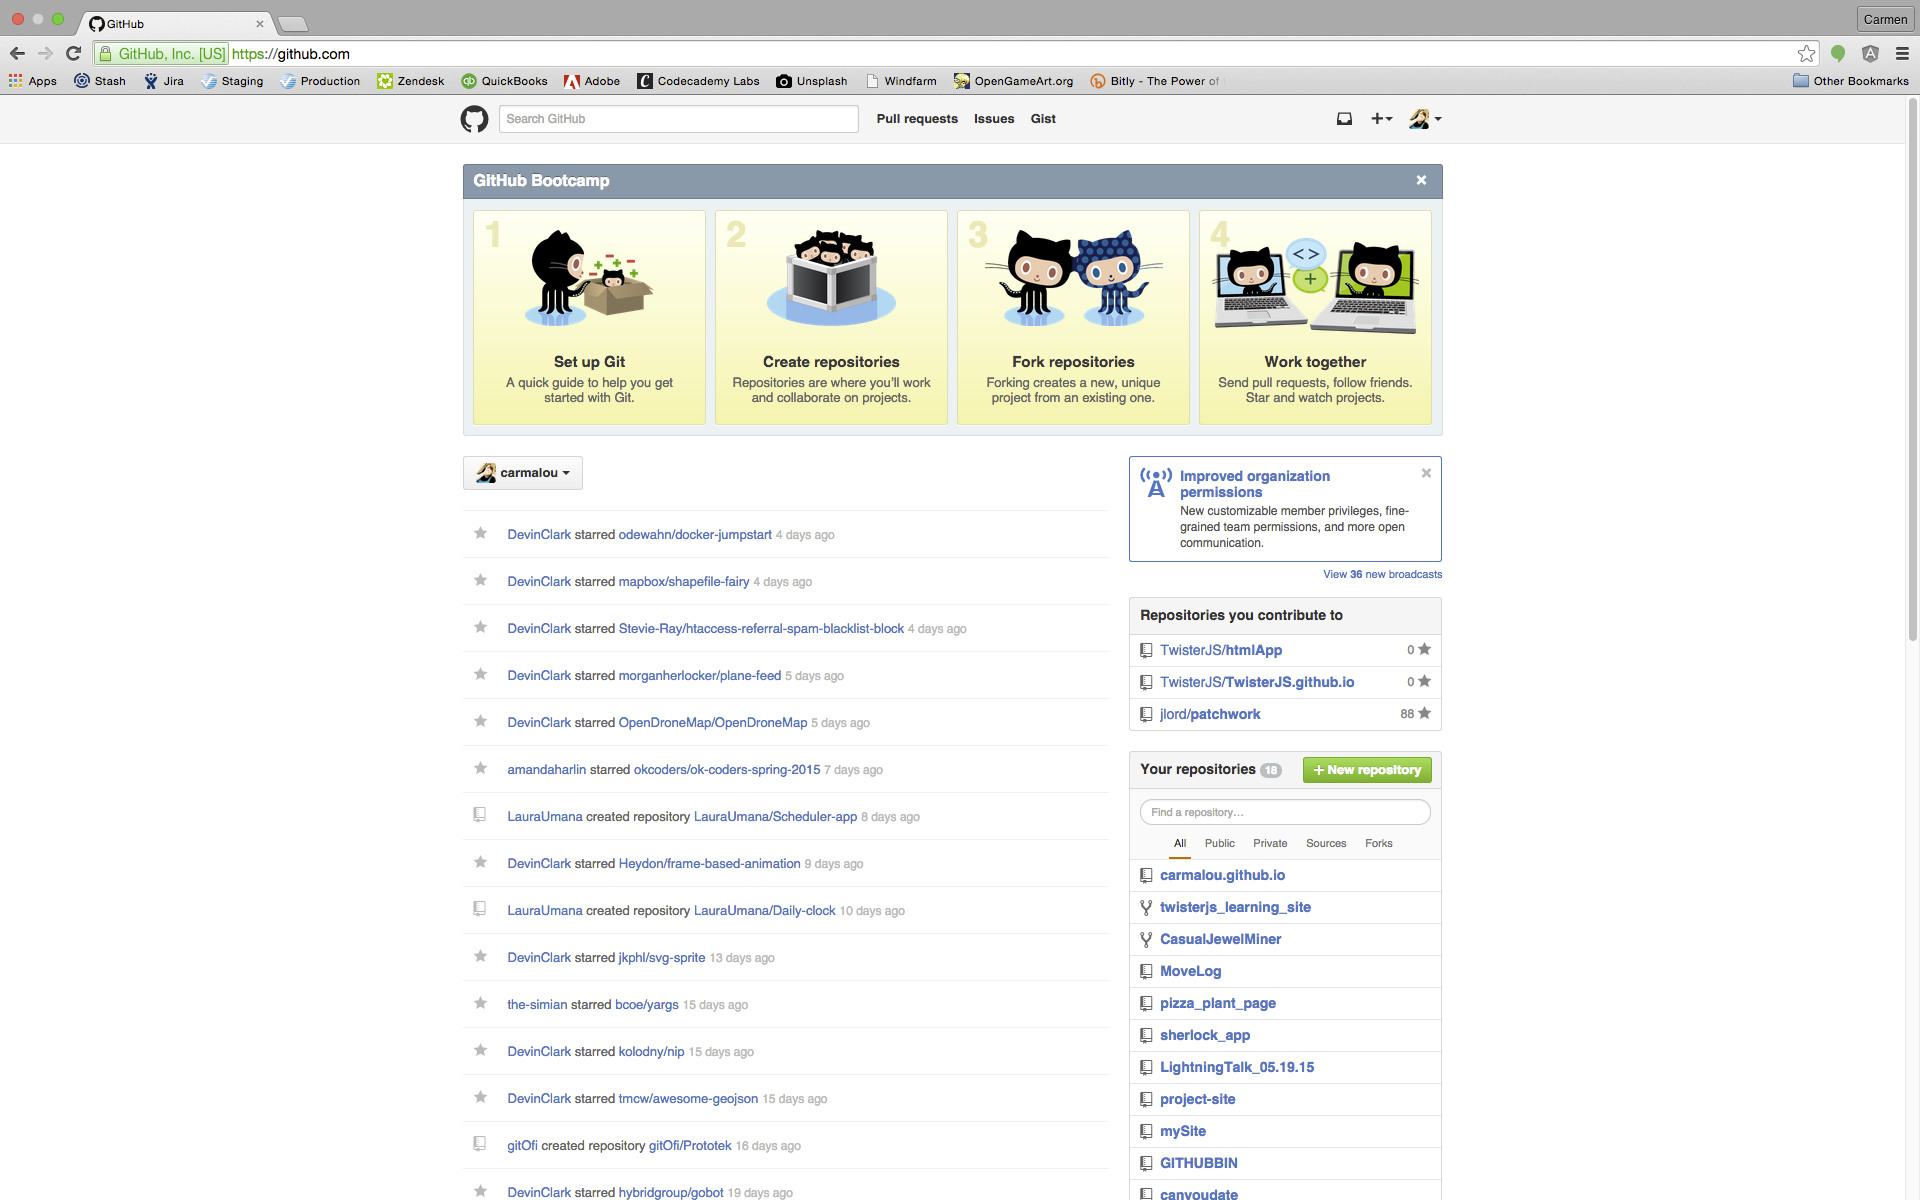
This is what your GitHub homepage looks like. Kind of like Twitter or Facebook. You’ve got the NewsFeed showing you what your coder friends have been up to. On the right side you’ll see a button with a plus sign on it, “+ New repository.” Click there and you’ll be able to make a new repository.
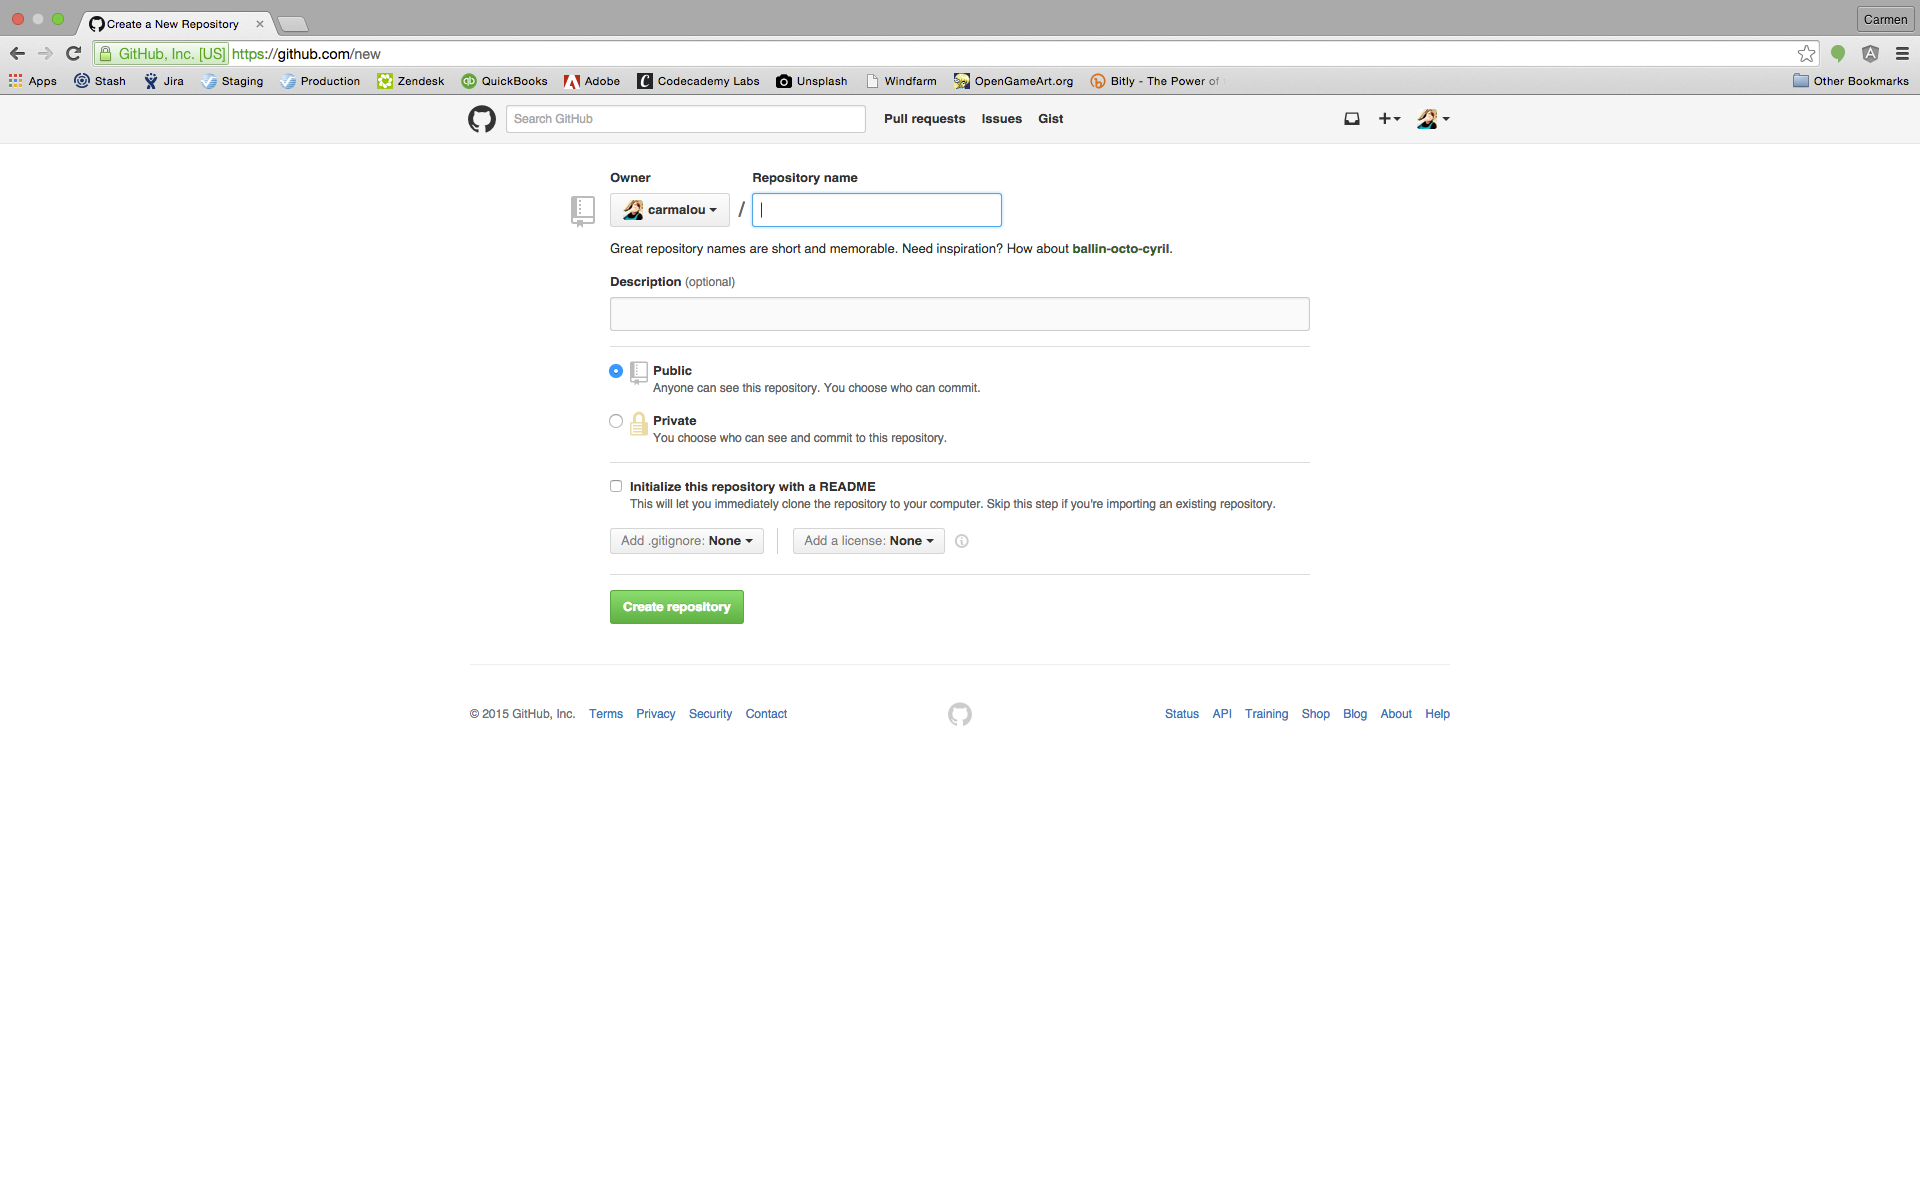 Pretty simple. Just fill in the blanks and BOOM. New repo. Look at you go!
Step 3: Man the terminal
 Ok, so this might be a little bit intimidating if you’ve never used the terminal before, but it’s not bad, I promise. And I’m whipping up a post about handy terminal commands here shortly, so you’ll be able to use that as a reference.
You can find the terminal by simply searching for ‘terminal’ in your spotlight on your Mac. I use iTerm, which you can get here. Using iTerm is fine, as is using your built-in terminal. Use your terminal to cd (change directory) into your desired directory.
Let’s take a quick look at these commands.
I usually skip the first echo command. All that does is write the name of your repository into a readme file. It’s fine to go ahead and use that command, or skip it.
git init
This command initializes the repository in your local directory.
git add
This command will add one or multiple files. If you run this command the way the picture above shows, you’ll only upload the single readme file. If you run instead ‘git add .’ (and remember that space, it’s important and no quotes) you’ll add all of the files and changes in your local directory. This does not actually upload the files. It only adds them so they can be committed.
git commit
This command is what actually commits your files. You’ll run ‘git commit -m “message here”’ (once again, spacing is important, and only place quotes around your message). Try to give a good message of what you’re actually uploading. This helps if you’re going back through old commits later trying to remember what they all were.
git remote add origin
You’ll only use this command once when you’re actually setting up your repo. This tells your local directory which URL to send those files to.
git push
You’ll run git push -u origin master to commit your first files to the master branch. Typically you’ll see master as the main branch, and all changes are pulled into master so it isn’t changed much. However, you can call your branches whatever you like.
The push commit will look like this…. ‘git push origin <BranchName>’
Step 4: Celebrate!
And that’s it! You’ve uploaded your first files into your brand new repo! If you refresh the page you’ll be able to see what your repo looks like now.
 This is just how to get started with your first repo on GitHub. Be sure to check out for my next post on pushing changes to GitHub.
I would also be remiss if I didn’t mention some of the other great resources out there for learning about GitHub. You can checkout an interactive class from Jessica Lord. The exercises are very informative and the class is fun!
Also check out CodeSchool’s Try Git class. While this class is free, I definitely recommend signing up for CodeSchool if you can afford it. There are lots of great classes on there, and they work hard everyday to add more classes for us. (Yup, I’m a student there!) Plus their jingles are pretty rad.
I hope this helps get you started, and I hope you come back for the next post in my GitHub weekend series!
Questions? Tweet me!

